

Adobe Illustrator is a powerful tool for creating vector graphics. It is widely used by graphic designers, artists and illustrators. Personally, I am a graphic designer and often use this tool. While using it, I realized that one of the most common tasks in Illustrator is cropping images. Cropping an image can help you remove unwanted parts of an image, change the aspect ratio, or focus on a specific part of the image. In this article, we will discuss three methods of cropping images in Adobe Illustrator.
Contents
What is an Illustration?
Before diving into methods for cropping images in Illustrator, let’s first define what an illustration is. An illustration is a visual representation of an idea, concept, or story. It can be a drawing, painting, photography or any other type of visual art. Illustrations are often used in books, magazines, advertisements, and websites to convey a message or tell a story.
From Wikipedia, the free encyclopedia:
An illustration is a decoration, interpretation, or visual explanation of a text, concept, or process, designed for integration in print and digitally published media, such as posters, flyers, magazines, books, teaching materials, animations, video games and films. An illustration is typically created by an illustrator. Digital illustrations are often used to make websites and apps more user-friendly, such as the use of emojis to accompany digital type. Illustration also means providing an example; either in writing or in picture form.
Wikipedia
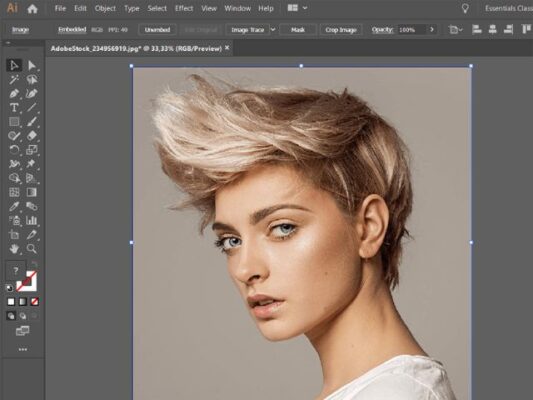
How to Crop an image in AI using the Crop Image function
The first method to crop an image in Adobe Illustrator is to use the Crop Image function. This is probably the function I use the most. Here are the steps to follow:
- Open or create a file in Adobe Illustrator.
- Place an image in Illustrator.
- Click on the Selection Tool.
- Click on the image you want to crop.
- Click on Crop Image in the Control Panel at the top of the screen.
- Click on and drag the crop marks in the corner of the image.
- Click on OK.
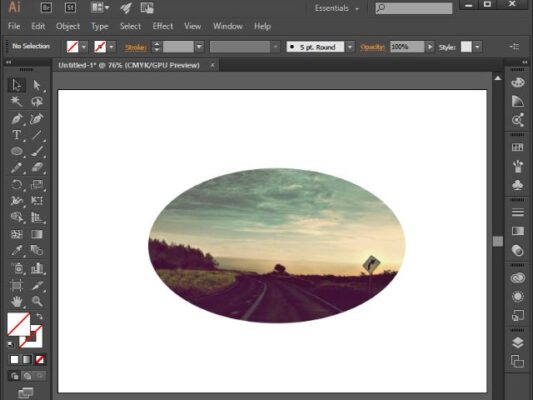
How to Crop an image in AI using the Clipping Mask function
The second method I want to mention is using the Clipping Mask function. This is also one of the popular functions for cropping images. Here are the steps to follow:
- Open or create a file in Adobe Illustrator.
- Create a shape that you want to use as a mask.
- Place the image you want to crop on top of the shape.
- Select both the shape and the image.
- Choose Object > Clipping Mask > Make.
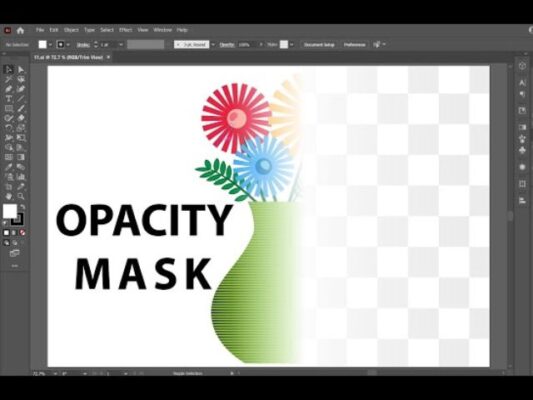
How to Crop an image in AI using the Opacity Masks function
The third method for cropping images in Adobe Illustrator is to use the Opacity Masks function. Here are the steps to follow:
- Open or create a file in Adobe Illustrator.
- Place an image in Illustrator.
- Create a shape that you want to use as a mask.
- Select both the shape and the image.
- Choose Object > Clipping Mask > Make.
- Select the image and choose Object > Clipping Mask > Edit Mask.
- Apply a black-to-white gradient to the mask.
- Adjust the gradient to control the opacity of the image.
Conclusion
Cropping an image in Adobe Illustrator is a simple task that can be performed using one of three methods: the Image Crop function, the Clipping Mask function, or the Opacity Mask function. I think each method has its own advantages and disadvantages, so it’s important to choose the method that best suits your needs. With these methods, you can easily crop images in Illustrator and create stunning vector graphics. If this article was helpful to you, start testing it now!